
You want your floors to look bright. Terrazzo floor restoration in 2026 is simple. Modern tools and products help you fix terrazzo floors. You do not need a terrazzo specialist or terrazzo flooring contractors. Anyone can restore terrazzo floors and get great results.
Tip: New equipment gives you the best look and makes the job easy.
Key Takeaways
- Restoring terrazzo floors is simple with new tools. You can get great results without paying an expert.
- There are five main steps: stripping, repairing, grinding, polishing, and sealing. These steps help you restore your floor well.
- Use eco-friendly strippers and cleaners. They keep you healthy and protect the environment during the work.
- Pick the right diamond abrasives for grinding. This helps your floor look smooth and shiny.
- Fix cracks and chips with UV-cured resins. This works fast and blends in with your floor.
- Polishing pads are important for a shiny finish. Use different pads in order for the best shine.
- Clean your terrazzo floor often. Dust every day and mop every week to keep it looking good and stop damage.
- Buy smart cleaning tools and eco-friendly products. These make cleaning easier and safer for your family.
Terrazzo floor restoration steps
Restoring your terrazzo floor can feel like a big project, but you can break it down into simple steps. You do not need to call terrazzo flooring contractors for every task. You can handle most of the work yourself if you follow the right process. Let’s walk through each stage so you get a smooth, shiny floor that looks brand new.
Note: Good preparation is the secret to a long-lasting terrazzo floor. If you skip steps, you might see problems like stains, dull spots, or cracks later.
Here’s a quick look at the main steps for full restoration:
| Step | Description |
|---|---|
| 1 | Stripping: Remove all waxes and residue. |
| 2 | Repair: Fix chips, fill nail holes, hand-chisel gouges, and remove surface stains. |
| 3 | Grinding: Use diamond grinding disks to eliminate scratches and uneven surfaces. |
| 4 | Polishing: Restore the surface to a smooth, reflective condition using a specialized polishing agent. |
| 5 | Sealing: Apply an environmentally friendly thermal sealer to maintain shine. |
Remove old finish
You need to start by taking off any old wax, sealant, or finish. This step helps you get rid of stains, marks, and buildup that make your floor look dull.
Stripping products
Pick a strong floor stripper that can handle several layers of finish. Many people choose green-certified products because they are safer for you and the planet. These strippers break down wax and old sealers without harsh fumes. Always follow the instructions on the label. Wear gloves and open windows for fresh air.
- Use a mop or applicator to spread the stripper evenly.
- Let it sit for the time listed on the bottle.
- Scrub with a soft pad or brush to loosen the finish.
Rinsing techniques
After stripping, you need to rinse the floor well. Any leftover stripper can cause problems later. Use clean water and a mop to wash away all residue. You might need to rinse more than once. Make sure the floor feels clean and not slippery. Let it dry before moving to the next step.
Tip: If you see sticky spots, rinse again. Sticky areas can trap dirt and ruin your new finish.
Cleaning methods
Now your floor is bare, but it still needs a deep clean. Dirt and grime can hide in tiny cracks and holes. Cleaning helps your repairs and new finish stick better.
Eco-friendly solutions
Choose a pH-neutral cleaner made for stone or terrazzo. These cleaners do not harm the surface. Some good options are StoneTech Neutral Cleaner, Bona Stone, Tile & Laminate Cleaner, and Miracle Sealants Tile & Stone Cleaner. Mix the cleaner with water as directed.
- Spread the solution with a mop.
- Scrub with a soft-bristled brush or use an automatic scrubber for bigger areas.
- Rinse with clean water to remove all soap.
Steam cleaning
Steam cleaning is a great way to lift deep-down dirt without chemicals. The hot steam loosens grime and kills germs. Move the steam cleaner slowly over the floor. Wipe up any moisture right away. Steam cleaning works well after stripping and before repairs.
Surface wetting
Before you repair cracks or chips, you need to wet the surface. A damp floor helps fillers and patching materials stick better. Use a spray bottle or damp mop to lightly wet the area. Do not soak the floor—just make it slightly damp.
Remember: Good cleaning and surface prep stop problems before they start. If you rush, you might have to redo the work.
If you follow these terrazzo floor restoration steps, you set yourself up for a beautiful, long-lasting result. Full restoration takes time, but each stage matters. You can save money and get pro-level results without hiring terrazzo flooring contractors.
Grinding and honing tools
You need the right tools to grind terrazzo floors. These tools help make your floor smooth and shiny. Do not skip any steps if you want good results. Grinding takes away scratches and makes the floor even. It also gets the floor ready for polishing.
Diamond abrasives
Diamond abrasives are the main tools for grinding. These pads or disks have tiny diamonds in them. The diamonds cut away the old surface and show new terrazzo. You must choose the right pad for your floor.
| Pad Type | Key Features | Best Use Case |
|---|---|---|
| Terrazzo Polishing Pads | Match pad bond to terrazzo hardness and aggregate type. | Hard aggregates like quartz. |
| CX Polishing Pads | Dry polishing performance on hard surfaces with premium diamond concentrations. | Hard aggregate surfaces requiring dry systems. |
| XPS Prop 2 Pads | Professional results on concrete and terrazzo with a single diamond system. | Mixed floor compositions or unknown formulations. |
| STI Terrazzo Plus Pads | Excels on aged terrazzo with consistent pressure distribution. | Aged terrazzo floors with uneven heights. |
| Bonastre Pads | Progressive three pad system for simplified maintenance. | General terrazzo maintenance and restoration. |
Grit progression
Grinding needs to be done in steps. Start with a rough grit to take out deep marks. Then use finer grits to make the floor smoother. If you skip a grit, you might see lines or rough spots. Each step makes the floor flatter and shinier.
Tip: Always vacuum after you change the grit. This keeps things clean and helps you see your work.
Wet vs. dry grinding
You can pick wet or dry grinding for your floor. Wet grinding uses water to cool the pads and stop dust. This keeps your floor and lungs safe. Dry grinding is faster and works with special pads like CX Polishing Pads. Always check your pad and floor before you choose.
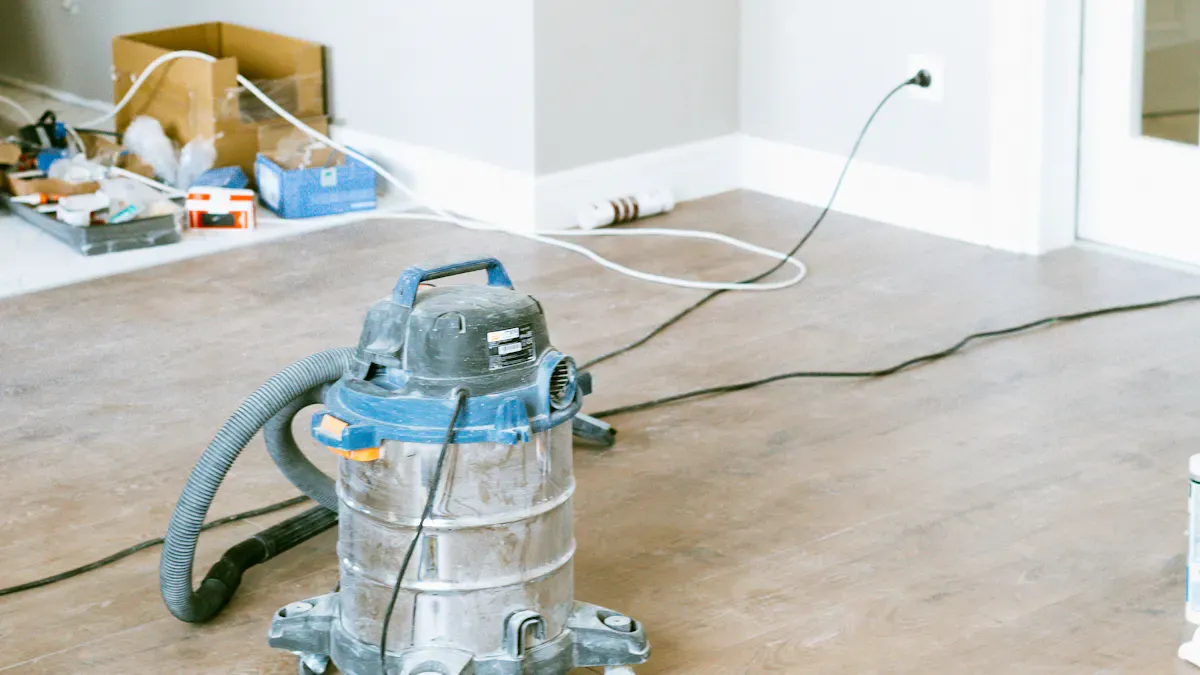
Dustless systems
Dustless systems help keep grinding safe and tidy. These machines suck up dust as you work. You do not have to worry about breathing in dust or cleaning up a mess.
- Dustless systems help keep the air clean.
- They make your home less messy during grinding.
- The vacuum gets your floor ready for the next step fast.
- You save time because you do not need to wipe up dust everywhere.
High-speed burnishing
High-speed burnishing makes your terrazzo floor shiny and bright. This step comes after grinding and before sealing. You use a machine that spins a pad very fast. The heat and speed make the floor shine without extra polish or long work. High-speed burnishing is fast, saves money, and keeps your floor looking new.
| Safety Precaution | Description |
|---|---|
| Dust | The grinding process generates significant dust, requiring proper ventilation and dust collection methods. |
| Chemical Exposure | Sealants and cleaning solutions may contain harmful chemicals, necessitating proper ventilation and safety measures. |
Remember: Wear a mask and open windows when you grind. Safety is always important!
If you use these steps and the right tools, you can grind like a pro. Your terrazzo floor will look smooth, clean, and ready for the next step.
Repair and patching
Terrazzo floors can last for decades, but life happens. You might see cracks, chips, or stains after years of use. Heavy objects, moisture, or just the house settling can cause damage. Before you start repairs, it helps to know what you’re dealing with.
| Cause | Description |
|---|---|
| Wax Buildup | Wax can hide the floor’s beauty and make cleaning tough. |
| Scratches | Foot traffic leaves fine scratches that dull the shine. |
| Cracks | Floors crack from movement, age, or missing expansion joints. |
| Chips and Spalls | Dropping heavy things or water damage causes chips, especially at the edges. |
| Divider Strip Damage | Damaged strips can trip you and look bad. |
| Staining | Spills and harsh cleaners leave stains that soak in. |
Crack and chip repair
You can fix most cracks and chips yourself with the right products. Start by cleaning the damaged area. Remove any loose bits and dust. This helps the repair stick and last longer.
UV-cured resins
UV-cured resins are a game-changer for terrazzo repair in 2026. These resins harden fast when you shine a UV light on them. You can fill cracks and chips in minutes. The repair bonds tight and stays clear, so it blends in with your floor. UV-cured resins also resist stains and moisture.
- Clean the crack or chip.
- Apply the UV resin with a small tool.
- Shine a UV lamp to cure the resin.
- Wipe away any extra before it hardens.
Tip: UV-cured resins work best for small cracks and chips. For bigger damage, you might need a flexible epoxy or color-matched filler.
Color-matched fillers
Color-matched fillers help your repair disappear. You can mix these fillers to match your terrazzo’s color and chips. Some kits even use digital color matching for a perfect blend. After you fill the crack, let it dry. Then, grind and polish the spot so it’s level with the rest of the floor.
- Mix the filler to match your floor.
- Fill the damaged area.
- Let it dry, then smooth it out.
Crack suppression membranes are another smart tool. You lay these under the terrazzo to stop cracks from spreading. They keep your floor strong and looking good for years.
Patch blending
You want your repairs to look invisible. Patch blending makes that happen. You use special tools and techniques to blend the patch with the old floor.
Digital color matching
Digital color matching lets you copy your floor’s exact color and pattern. You scan the terrazzo, then mix resins and chips to match. This step helps your patch blend in, so no one can spot the repair.
Micro-topping
Micro-topping is a thin layer you spread over the patch. It smooths out the surface and hides any lines. After it dries, you grind and polish the area. The patch feels and looks just like the rest of your floor.
Here’s how pros blend patches for a seamless look:
- Clean and square off the damaged spot.
- Mix and apply the color-matched resin.
- Let it dry completely.
- Grind and hone the patch flush with the floor.
- Polish and seal for a glossy, protected finish.
Note: Take your time with blending. Careful work now means you won’t see the repair later.
With these modern repair and patching methods, you can fix almost any terrazzo problem. Your floor will look smooth, strong, and ready for years of use.
Polishing and finishing
This is the best part of terrazzo floor restoration. Your hard work pays off now. The floor starts to shine and look new. Let’s talk about the tools and products for polishing in 2026.
Polishing pads
Picking the right polishing pad matters a lot. Good pads make your floor shiny and last longer. Here are some pads that work well for terrazzo floors:
| Type of Polishing Pad | Description |
|---|---|
| High-Quality Terrazzo Floor Polishing Pads | Made with strong diamond materials for good performance. |
| 3 Inch Resin-bond V8 Polishing Pads | Special resin pads for polishing terrazzo floors. |
| Resin-bond PolarShine Polishing Pads | Made to give terrazzo floors a bright shine. |
| Concrete Resin-bond Polaris Polishing Pads | Works on concrete and terrazzo, makes them shiny and tough. |
| Flexible Resin-bond Diamond Polishing Pads | Flexible pads for different polishing jobs. |
| E-shine Triple Row resin polishing pads | Triple row pads for fast and easy polishing. |
| Triumph 3-step Diamond Dry Polishing System | Four-row resin pads for strong polishing results. |
3M™ Trizact™ Diamond TZ
3M™ Trizact™ Diamond TZ pads are a great choice. They use special diamond technology. These pads cut fast and leave the floor smooth. You get good results even if you are new to terrazzo restoration. Many people like these pads because they last long and are easy to use.
High-gloss results
You want your terrazzo floor to shine bright. The right pads help you get a glossy finish. Start with a rough pad, then use finer pads. Each step makes the floor shinier. When you finish, your floor reflects light and looks new. You will see the difference right away.
Tip: Clean the floor between pad changes. This keeps the shine nice and stops scratches.
Vitrifying and sealing
Vitrifying is a smart way to protect your terrazzo floor. It makes a shiny layer that keeps out stains and locks in the shine.
| Benefit | Description |
|---|---|
| Prevents Damage | Sealing stops water, oil, and spills from hurting the floor. |
| Enhances Durability | The shiny layer makes the floor stronger and stops scratches. |
| Reduces Maintenance Costs | Vitrifying means you do not need to clean or fix the floor as much. |
| Eco-Friendly Solution | You do not need to use wax or harsh chemicals often, which is better for the planet. |
Vitrifying makes your floor stronger and keeps it shiny longer. You do not need to wax as much. Your floor stays nice even in busy places.
Nano-coatings
Nano-coatings add more protection. They stop stains and make cleaning easier. NanoPrime Fast Drying Sealer dries fast and works well in tough places. Nano-coatings also help indoor air because they have no bad fumes.
Stain-resistant sealers
Stain-resistant sealers keep your terrazzo looking good. STAIN-PROOF® Premium Impregnating Sealer stops water and oil from soaking in. It sticks to the floor so spills do not leave marks. NanoPrime Fast Drying Sealer is good for homes and big buildings. Both sealers help your floor fight stains and sun damage.
Note: Terrazzo restoration products in 2026 use recycled materials and help the planet. You get a strong floor, less work, and cleaner air.
If you use good polishing pads, vitrify your floor, and add nano-coatings or stain-resistant sealers, your terrazzo floor will look beautiful and last a long time.
Maintain and restore terrazzo floors
Keeping your terrazzo floor looking fresh doesn’t have to be hard. You can follow a few easy routines and use smart tools to keep your floor shining year after year. Let’s break down what you need to do.
Routine care
Daily and weekly cleaning
You want your terrazzo floor to stay clean and bright. Dust and dirt can scratch the surface if you leave them too long. Make daily and weekly cleaning part of your routine.
- Dust mop or sweep every day. This stops dirt from building up and keeps your floor safe.
- Wet mop once a week with a neutral cleaner made for terrazzo. Make sure you rinse well so no residue stays behind.
- Clean up spills right away. Quick action prevents stains and keeps your floor looking new.
- Deep clean with hot water extraction or a floor buffer when you see dull spots or embedded dirt.
Tip: If you use a clean cotton string mop and a mop bucket, you make the job easier and faster.
Preventing damage
You can stop most damage before it starts. Simple habits help your terrazzo floor last longer.
- Place mats at entryways to catch grit and moisture.
- Avoid harsh chemicals or rough scrubbers. Stick to pH-neutral cleaners.
- Inspect sealers twice a year. Reapply if you see dull spots or wear.
- Move heavy furniture carefully. Use pads under legs to prevent chips.
| Maintenance Task | How Often | Why It Matters |
|---|---|---|
| Dust mopping | Daily | Stops scratches and dullness |
| Wet mopping | Weekly | Removes grime and residue |
| Sealer inspection | Twice a year | Keeps shine and protects floor |
| Spill cleanup | As needed | Prevents stains |
Recommended tools 2026
Smart cleaning devices
You have access to smarter tools in 2026. These devices make cleaning easier and safer.
- Auto scrubbers clean large areas fast and leave no streaks.
- Floor buffers restore shine and remove tough dirt.
- 3M™ Trizact™ Diamond TZ Abrasive Pads cut quickly and keep their sharpness, so you get a beautiful finish without harsh chemicals.
- Scotchgard™ Stone Floor Protector needs only two coats and protects against stains, scuffs, and scratches.
Note: Smart devices save you time and help you get professional results at home.
Eco-friendly products
You can choose products that are safe for your family and the planet.
- Prosoco 2010 All Surface Cleaner is non-caustic and reduces slipperiness. It works well for regular cleaning.
- Dr. Bronner’s Pure-Castile Soap is nearly pH-neutral, affordable, and easy to find. You can use it for indoor terrazzo floors.
- Microfiber applicators help you spread cleaners and sealers evenly without wasting product.
- Water-based sealers protect your floor and dry quickly. They don’t release strong fumes.
Callout: Eco-friendly cleaners and smart tools make terrazzo floor care simple and safe.
If you follow these routines and use the best tools, your terrazzo floor will stay beautiful for years. You don’t need to be an expert. Just stick to the basics and enjoy your shiny, strong floor.
You can restore terrazzo floors without worry. New tools and easy steps help anyone fix terrazzo floors. There are good reasons to start now. Terrazzo floor restoration saves money in the long run. It also keeps your space looking nice. You just need to repair, polish, and seal the floor. This brings back the shine. Taking care of your floor often saves you money. It also means less waste and a stronger floor for a long time. Follow these steps and you will have a pretty floor that is easy to keep clean every day.
FAQ
How often should I reseal my terrazzo floor?
You should reseal your terrazzo floor every 1–2 years. If you see dull spots or water does not bead up, it is time to reseal. Regular sealing keeps your floor shiny and protected.
Can I use vinegar or bleach to clean terrazzo?
No, you should not use vinegar or bleach. These products can damage terrazzo and remove its shine. Stick with pH-neutral cleaners made for stone or terrazzo floors.
What if my terrazzo floor has deep cracks?
You can fix deep cracks with UV-cured resin or color-matched filler. For very large cracks, you may want to call a pro. Most small cracks are easy to repair yourself.
Do I need special tools to polish terrazzo?
Yes, you need diamond polishing pads and a floor machine. You can rent these tools at most hardware stores. Using the right tools gives you the best shine.
Is terrazzo restoration messy?
Restoration can get messy, but dustless systems help a lot. Use a vacuum with your grinder and open windows for fresh air. Clean up dust right away for a tidy workspace.
Can I walk on my terrazzo floor right after sealing?
Wait at least 4–6 hours before walking on your floor. Let the sealer dry fully. For best results, wait 24 hours before moving furniture back.
What is the best way to prevent stains on terrazzo?
Wipe up spills as soon as they happen. Use mats at doors and reseal your floor regularly. These steps stop stains and keep your terrazzo looking bright.
Are eco-friendly products safe for terrazzo?
Yes! Eco-friendly cleaners and sealers work well on terrazzo. They protect your floor and are safe for your family and pets.